How to convert OST to PST in Outlook 2016?

Previous Topic Next Topic
 
classic Classic list List threaded Threaded
4 messages Options
Reply | Threaded
Open this post in threaded view
|

How to convert OST to PST in Outlook 2016?

simmyjohnson
Since the manual method of conversion is not accurate and mostly crashes down, it is ameliorate to rely on third party tools like the SysInspire OST to PST converter software.
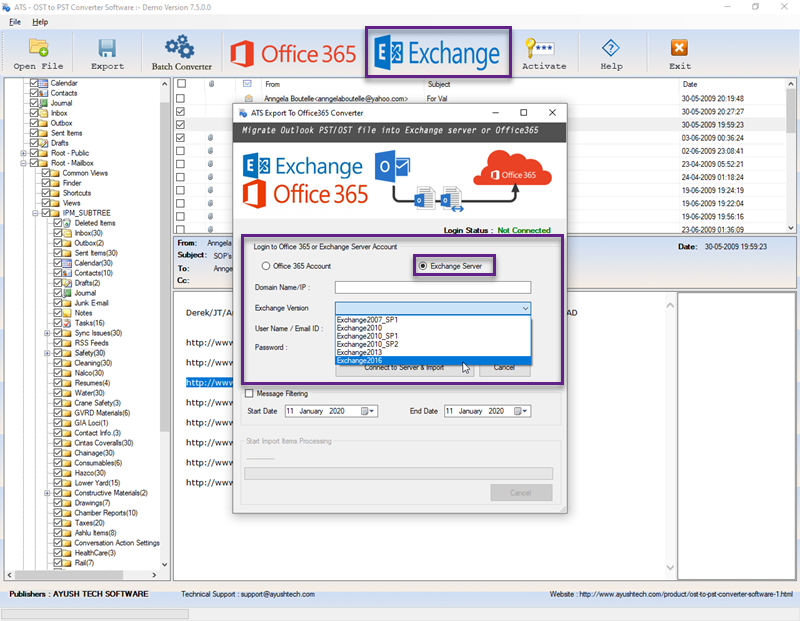
  Step 1: Download and Install SysInspire Software to import OST File in Outlook.
   Step 2: Run the software and select an OST file.
   Step 3: Now choose Scanning mode to handle corrupt OST files.
   Step 4: Click on the OK button after the completion of the scanning process.
   Step 5: Now preview the OST mailbox before converting it to a PST file.
  Step 6: Click on the Save button and select the folder requisite to save the recovered OST file.
     Step 7: Click on OK to import the OST file to PST file.
After this, your OST file can be successfully imported to Outlook.

More info:- Convert OST to PST in Outlook 2016


Reply | Threaded
Open this post in threaded view
|

Re: How to convert OST to PST in Outlook 2016?

laboyi8236
Use to OST to PST Exporter Download that will move to your all data from the Offline OST file into Outlook file. This app arises to show showing off getting enhanced OST files in Outlook PST. I am also using this application for a long time and deed the preeminence performance.

See more here about software: https://www.sametools.com/convert/ost/
Reply | Threaded
Open this post in threaded view
|

Re: How to convert OST to PST in Outlook 2016?

emilybrowning
In reply to this post by simmyjohnson
ATS OST to PST Converter does the recovery of databases like emails, contacts, tasks, notes, appointments, and journals from any corrupted and inaccessible file. It can convert your OST file to multiple readable file formats like PST, EML, EMLX, MSG, vCal, vCard etc. Download the demo version of the converter from the official website of ATS OST Converter.


Read More Info: https://www.bulkecommerce.com/store/ats-ost-to-pst-converter-software-159.html
Reply | Threaded
Open this post in threaded view
|

Re: How to convert OST to PST in Outlook 2016?

willjoe
In reply to this post by simmyjohnson
In Microsoft Outlook 2016, you can convert an OST (Offline Storage Table) file to a PST (Personal Storage Table) file using the built-in "Import and Export" feature. This method allows you to access the contents of your OST file even if your Exchange server is not available. Here's how to convert OST to PST in Outlook 2016:

Step 1: Open Outlook in Cached Exchange Mode

Before proceeding, ensure that your Outlook is configured in Cached Exchange Mode, which creates and uses an OST file. Cached Exchange Mode should be active by default in most cases.

Step 2: Access the "Import and Export" Wizard

Open Microsoft Outlook 2016 on your computer.

Click on "File" in the top menu to open the Backstage view.

In the Backstage view, click on "Open & Export" on the left-hand side.

Select "Import/Export" from the options that appear on the right.

Step 3: Start the Import/Export Process

In the "Import and Export Wizard" window that opens, choose "Export to a file" and click "Next."

Select "Outlook Data File (.pst)" and click "Next."

Choose the folder or email account you want to export. If you want to export the entire mailbox, select the top-level folder (usually named after your email address). If you want to export specific folders, you can select them individually.

Choose a destination location and name for the PST file. You can use the "Browse" button to select a specific folder where you want to save the PST file.

Click "Finish" to start the export process.

Step 4: Enter Optional Password (If Needed)

If you want to password-protect your exported PST file, you can enter a password in the "Create Outlook Data File" dialog box that appears. Otherwise, you can leave the password fields blank and click "OK."

Step 5: Wait for the Export to Complete

The time it takes to complete the export process depends on the size of your OST file and the amount of data being exported. Once the process is complete, you will see a message indicating that the export was successful.

Step 6: Access the PST File

The PST file you exported will now be available in your chosen destination folder. You can use this PST file to access your data even if you are not connected to the Exchange server.

Greetings,
Will